
Sea Creatures Craft for Kids: Shark, Frog and Fish
Find a babysitter or babysitting job, or stay up to date with the latest childcare tips!
Get started today for free.
Get startedWho would've known there were so many fantastic uses for the humble toilet paper roll? Recycle your empty toilet paper rolls to create unique crafts the kids will love! We crafted a school of colorful koi fish, a cool grey shark, and vibrant green-spotted frogs. Read on to find out how you can make them, too!
Toilet Paper Roll Crafts
Materials
- Empty toilet paper rolls
- Acrylic paint, colored pencils or markers
- Scissors
- Stapler
- Glue
- Pencil & eraser
Koi Fish Toilet Paper Roll Craft
What’s more beautiful than a colorful koi fish? Create your own using little more than empty toilet paper rolls and a bit of paint! Why not add gold or silver to really make the scales pop?

Step 1
Gather your materials! We used acrylic paint to give our koi fish their beautiful colors.
Step 2
Paint each toilet paper roll in a color of your choice.
Step 3
Create the fish scales by painting small ‘U’ shapes.
Step 4
Paint fins and a fish tail for each fish onto thick paper or card (we used acrylic paper). There’s no need to be too fussy here - simple shapes will do the trick.
Step 5
Carefully cut out your fish tails. This step might require help from a parent or babysitter!
Step 6
We matched the fish tails to the colors of the fish scales.

Step 7
Squeeze the sides of the toilet paper roll together and staple your fish tail to the toilet paper roll (fish body).
Step 8
Carefully cut out the fish fins.
Step 9
Paint (or color) long, thin strips of card in a shade of pink (this will be the fish’s lips).
Step 10
Glue or staple the fish lips around the toilet paper roll.
Step 11
Add the fish’s eye. To create the eye, we simply painted a black dot on a piece of white card and then cut a circle around it.
Step 12
Voila! You have yourself a school of fabulously colorful fish.

Frog Toilet Paper Roll Craft
This super cool toilet paper roll craft doubles as a game! See if you can catch the fly in the clever frog’s mouth. Make multiple frogs to challenge your friends!

Step 1
Firstly, make sure you have some empty toilet paper rolls! (Luckily, kids always leave them in the toilet instead of putting them in the trash).
Step 2
Paint the toilet paper rolls green.
Step 3
In a lighter shade of green, paint large circles onto your toilet paper rolls.
Step 4
Using a pencil, trace the outline of frog legs onto thick paper.
Step 5
Paint the frog legs green. You might also like to add light green spots to your frog legs too.
Step 6
Carefully cut out the frog legs.

Step 7
Cut out a simple fly shape and glue it to the end of a length of string (approx. 20cm).
Step 8
Staple the other end of the string to the frog legs.
Step 9
Paint a long strip of paper red and glue/staple it around the toilet paper roll.
Step 10
Pull the string through the toilet paper roll and staple the frog legs to the toilet paper roll.
Step 11
Create the frog eyes by painting a black dot onto thick white paper. Carefully cut a circle around the painted dot.
Step 12
Glue the eyes in place and you’re done!

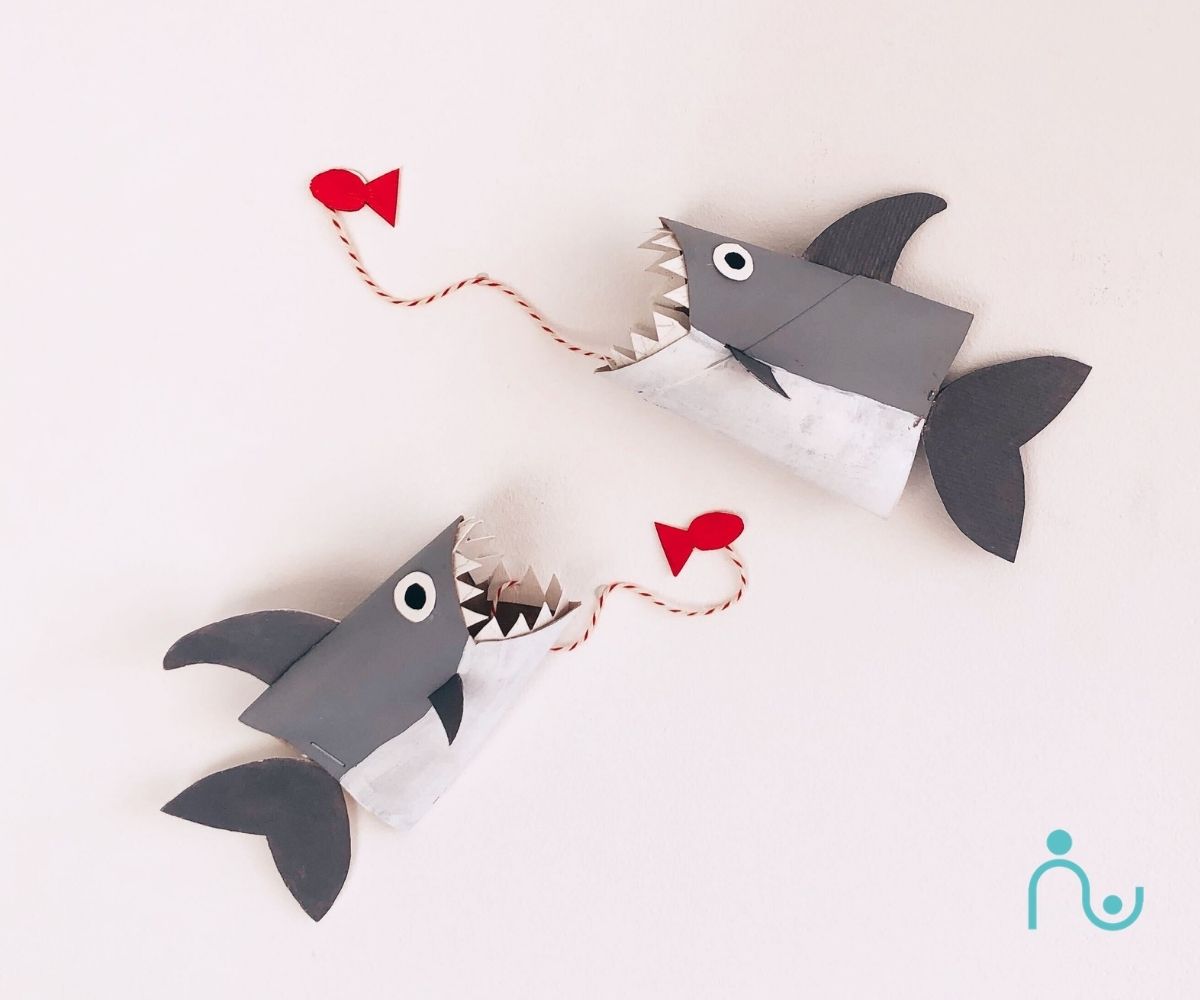
Shark Toilet Paper Roll Craft
Create these sharks with big sharp teeth! This craft can also double as a fun game to play with friends. See who can catch the fish first!
Step 1
Prepare by gathering a few toilet paper rolls (depending on how many sharks you’d like to make!).
Step 2
Paint your toilet paper rolls grey.
Step 3
Paint the bottom half of your toilet paper roll white for the shark’s belly and then cut a ‘V’ shape from one end of your toilet paper roll (for the shark’s mouth).
Step 4
Cut out a zigzagged length of paper for the shark’s teeth.
Step 5
Glue the teeth in place.
Step 6
Paint simple outlines of the shark’s fins and tail onto thick paper.

Step 7
Cut out the shark fins and cut slits on both the top and sides of the toilet paper roll (be careful, this step requires help from a parent or sitter!). Push the shark fins into the carefully cut slits.
Step 8
Glue eyes on either side of the toilet paper roll. To create the eyes, simply paint a black dot on thick white paper and cut a circle around the dot.
Step 9
Cut out a simple fish shape and glue it to a length of string (approx. 20cm).
Step 10
Staple the other end of the string to the shark tail.
Step 11
Pull the string through the toilet paper roll so that the fish is at the shark’s mouth. Staple the shark tail in position by squeezing the sides of the toilet paper roll.
Step 12
You’re done! This craft also doubles as a fun game - see if you can get the fish in the shark’s mouth!

Did you enjoy this DIY? Be sure to check out our other crafts for kids for more inspiration! We’d love to see your fantastic toilet paper roll crafts. If you created your own frog, fish, or shark, be sure to show us! Tag us on Instagram or Facebook and we’ll share it with the Babysits’ community.


